| api | ||
| doc | ||
| install | ||
| ui | ||
| .dockerignore | ||
| .drone.yml | ||
| Dockerfile | ||
| LICENSE | ||
| README.md | ||
OVDashboard
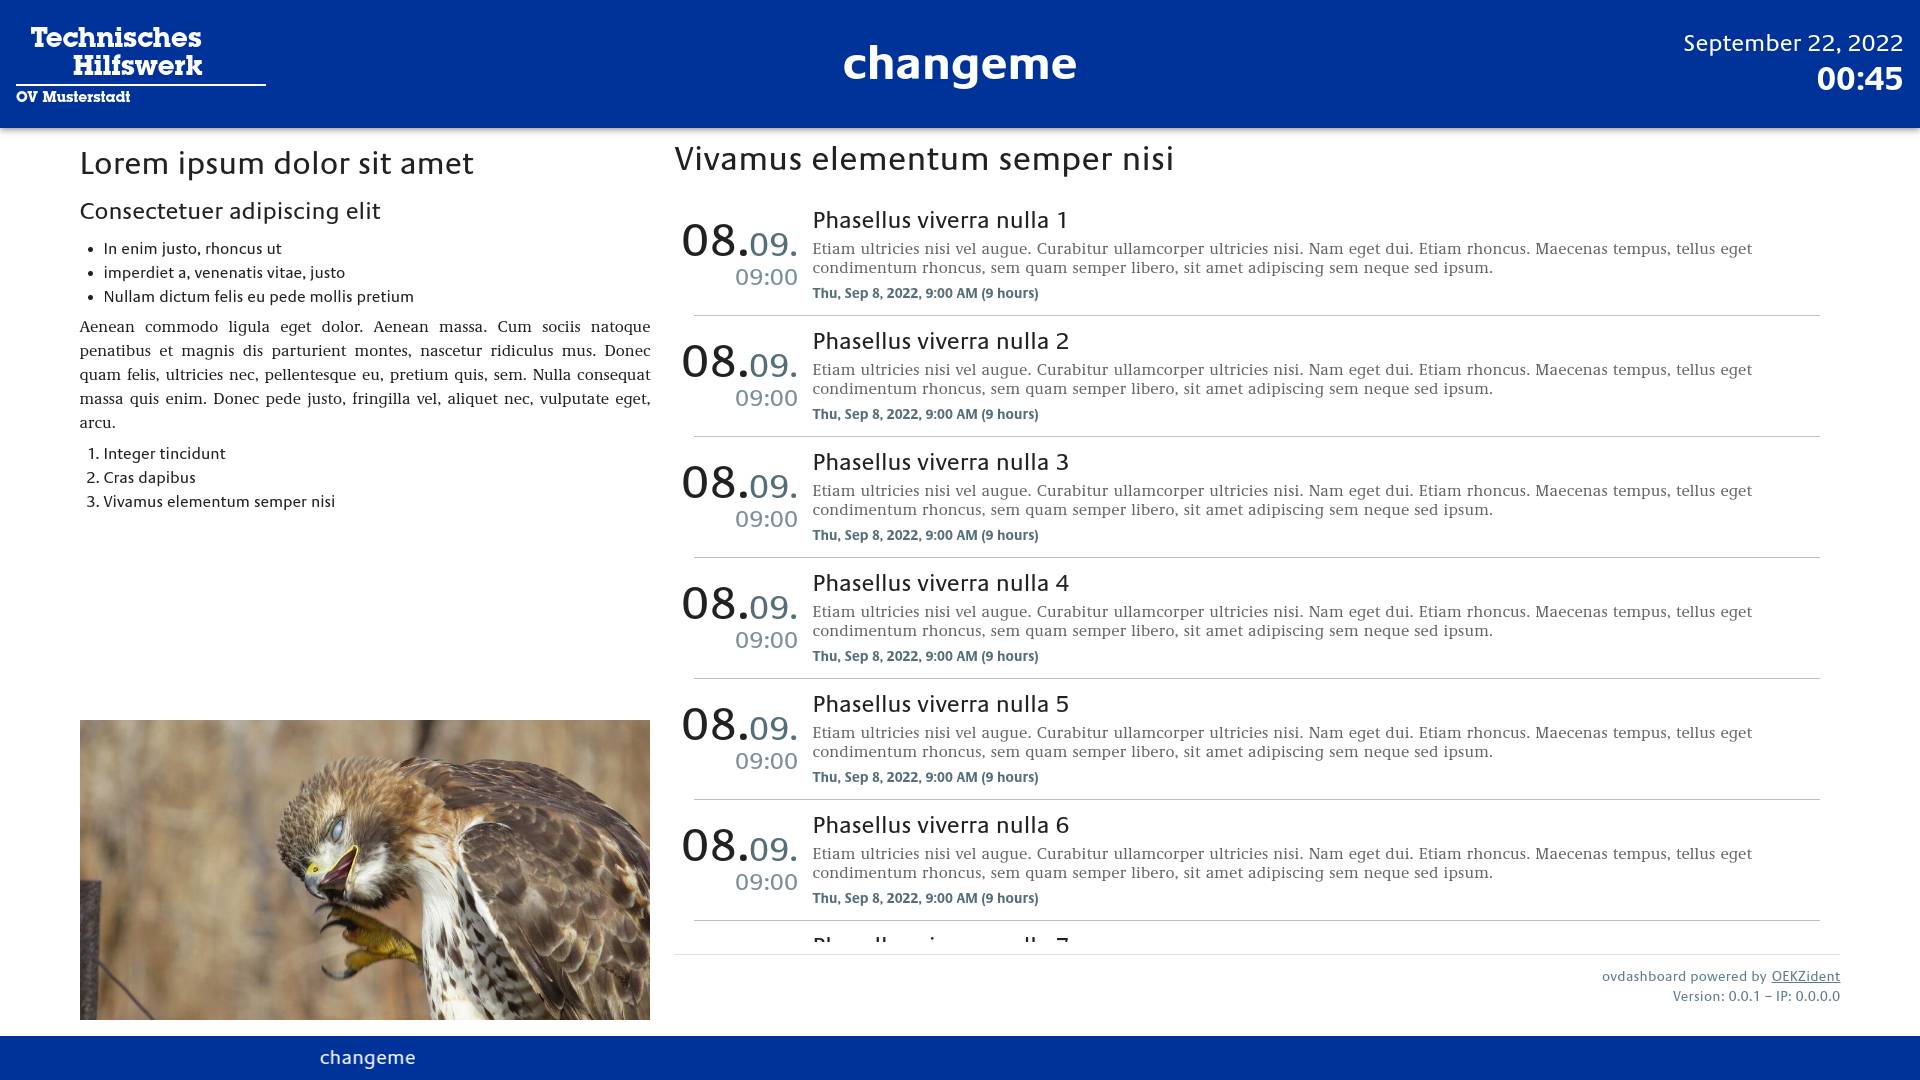
A fancy dashboard for use in a THW-Ortsverband (OV).
Key Features
-
Clean Look
All that matters, at one glance!
Date and Time – Upcoming Events – Public Announcements – News – Pictures -
Easy Install
Set up a RaspberryPi, run the installer script, done! -
DAV Server Interface
Update your content anytime, from anywhere! Basic Markdown is enough!
Already have a Nextcloud instance? OVDashboard will take it from there! -
Customizable – Yet Always Recognizable
Change the Logo – Put your own Title – Publish Pictures – Create Event Lists – Customize the News Ticker Appearance – Adjust Item Rotation Speed -
Responsive Design
OVDashboard is made for the big screen – but it also shines in your visitors' mobile browsers! -
Locale Aware
No localized strings anywhere – formats generated using Luxon, which respects your browsers' settings! -
Hackable
The Dashboard UI is created using Vue and the Vuetify UI library.
Like my layout, but want it for something completely different? Fork me!
Quick Start
Prerequisites
Make sure you have a WebDAV and CalDAV account available.
For an all-in-one solution, consider setting up an account on a Nextcloud instance!
On your WebDAV account, create a resource (directory) named ovdashboard1.
Your target device should be a Raspberry Pi Model 3 or later2. You will need some accessories:
- microSD card, class 10 or UHS (min. 8 GB)
- network connectivity (bring WiFi credentials if applicable)
- connection to a HDMI screen
It is also heavily advisable that you log into your device using SSH, so you should get another device (PC, tablet or smartphone) onto the same network as your OVDashboard.
Install Base System
OVDashboard is designed to run on a DietPi installation. Full installation documentation is available at dietpi.com. To quickly get up and running:
- Download Image from dietpi.com/#download
- Uncompress Image and flash onto SD card – you might need "7zip", "balenaEtcher" and/or other tools
- Check the SD card, open "dietpi.txt" and change some options (full documentation here):
- For WiFi, use
AUTO_SETUP_NET_WIFI_ENABLED=1andAUTO_SETUP_NET_WIFI_COUNTRY_CODE=DE, and also check "dietpi-wifi.txt" - System options, e.g.
AUTO_SETUP_AUTOMATED=1,AUTO_SETUP_NET_HOSTNAME=OVDashboard,AUTO_SETUP_GLOBAL_PASSWORD=dietpi,AUTO_SETUP_LOCALE=de_DE.UTF-8,AUTO_SETUP_KEYBOARD_LAYOUT=de,AUTO_SETUP_TIMEZONE=Europe/Berlin,CONFIG_SERIAL_CONSOLE_ENABLE=0
- For WiFi, use
- Be sure to at least change the password (and remember it 🙂️), then put the SD card into your device and boot it. Let the first time setup finish, it will take a bit. It will let you know when it is done!
- Log into your device using SSH. By default, that's user name
rootand passworddietpi
Install OVDashboard
Download (and review) the OVDashboard install script, then run it from a terminal.
This can all be done after logging into your prepared device:
- The safe way:
mkdir /tmp/ovdashboard && cd /tmp/ovdashboardwget 'https://code.yavook.de/OEKZident.de/ovdashboard/raw/branch/master/install/install.sh'less install.shand/or edit withnano install.shsh install.sh
- If you feel adventurous and do not want to review the script, just run
sh <( curl --proto '=https' --tlsv1.2 -sSf 'https://code.yavook.de/OEKZident.de/ovdashboard/raw/branch/master/install/install.sh' )
There will be some prompts during installation.
- DietPi might ask if you want to change your GPU split. Choose Yes.
- DietPi will ask if you want to configure autostart options. Cancel that, this choice does not matter as it is changed by the installer.
- The installer will ask for the connected display's resolution. The default values should be fine, you can likely just hit Return here.
- The installer will ask for "display languages". This determines internationalization on the kiosk (connected display). For German, enter
de-DE,de,en-US,en.
Afterwards, reboot your device (reboot in the terminal). Your OVDashboard should be working now.
For a better understanding of your newly created OVDashboard, refer to the about section.
Updates, upgrades
Configuration
Setup for development and contribution
Refer to the specific README files for the API and the UI to contribute to one of those sub-projects.
About the "default" OVDashboard deployment
The default deployment is made up of three parts: The installer runs once, prepares your device for OVDashboard usage and deploys the server.
The server will then run continuously and make OVDashboard available as a web application in your network.
Also, a browser is installed to display the OVDashboard using your device.
The OVDashboard installer will:
- install and set up Docker, Docker Compose and Chromium-Browser
- create the OVDashboard Compose project at
/opt/ovdashboard - get a
dockerimage fromcode.yavook.decontaining the OVDashboard server - set up your device to auto-run Chromium in "kiosk" mode to display the local OVDashboard
- auto-hide your mouse cursor
